ALE to CCC Converter: A Quick Workflow Utility

I had a need for this the other day while prepping a timeline and couldn't find anything quickly. I needed a straightforward way to rip CDL data—Slope, Offset, Power, and Saturation—out of an Avid Log Exchange (.ale) file and pack it into a standard Color Correction Collection (.ccc) XML for the pipeline.

Usually, extracting this metadata means firing up a heavy piece of software or navigating a massive proprietary pipeline tool, but I just wanted a lightweight, standalone utility. Since Python is the only language I code in, I threw together a script to parse the formatting and wrapped it in a basic GUI so others wouldn’t need to hit a terminal.
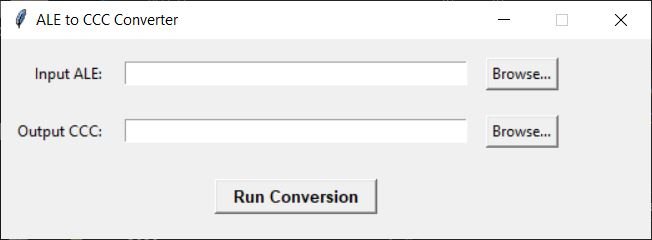
What It Does

The tool is incredibly simple but handles the core pipeline hazards:

  • Reads the ALE: It locates the Column and Data sections and parses out the ASC_SOP and ASC_SAT values.

  • Formats the Math: It converts the raw ALE tuple strings into properly structured XML nodes.

  • Namespace Protection: If a source clip is cut multiple times in your timeline, it auto-increments the ID strings so your downstream conform tools don't overwrite duplicate CDL tags.

It runs locally, requires no external dependencies (the GUI uses standard tkinter), and outputs a perfectly formatted XML tree ready for OpenColorIO or your finishing system of choice.

Here is the download if anyone needs it:

happy to help,

JD

How to - Add a LUT in Avid Media Composer

There are several ways to load LUTs into Avid Media Composer:

1. Through Source Settings:

  • Right-click on a clip in your bin or timeline.  

  • Select "Source Settings."  

  • Under the "Color Encoding" tab, go to "Color Adapter Type."  

  • Click on the dropdown menu and choose "User Installed LUTs." You can add LUTs you have already loaded to the source clip and hit “Apply”

  • To load a LUT click Color Management Settings and then click “Select LUT file”

  • Browse your LUT file's location (.cube or .lut format) and select it.

  • Click "Open" to load the LUT.

2. Through Color Management Settings:

Color Management Settings
  • Go to "Settings" in the menu bar.

  • Select "Color Management."  

  • Under the "Project" or "Shared" tab (depending on where you want the LUT to be available), click "Select LUT File."  

  • Browse for your LUT file and select it.  

  • Click "Open" to load the LUT.  

3. Using the "Color LUT" Effect:

  • Go to the "Effects" tab in the Effect Palette.

  • Under "Image" effects, find and drag the "Color LUT" effect onto your clip in the timeline.  

  • In the Effect Editor, click on the dropdown menu next to "LUT File" and choose your loaded LUT.

Avid LUT Effect on Filler track

Additional Tips:

  • LUTs should be in either .cube or .lut format to be compatible with Avid.

  • Make sure to place the LUT files in a location you can easily access and remember.

  • You can organize your LUTs by creating subfolders within the Avid LUTs directory.

  • Shared LUTs are available to all projects, while project-specific LUTs are only accessible within the current project.

For more detailed instructions and visual guides, you can refer to these resources:

I hope this helps! Let me know if you have any other questions.
