Spinning in Style: Coloring a 360° RED Camera Rig for Balenciaga

I had a very cool project this spring that I wanted to share. Let’s talk about high fashion, high resolution, and the high-difficulty world of 360-degree video.

Recently, I had the pleasure of jumping into the trenches for Balenciaga’s Fashion Week presentation. The setup was as ambitious as the clothes: a massive 360-degree rig, fully loaded with RED cameras, all feeding into a Disguise system to power a mind-bending visual experience.

My official job title for this gig? Just the colorist.

But anyone who has ever touched a multi-camera array knows that "just the colorist" is a trap. If you grade each camera feed in a vacuum, you are going to hand back a beautiful, completely disjointed mess. To ensure the color handed off seamlessly from one camera's field of view to the next, I had to step slightly out of my lane and build a temp stitch.

Here is a deep dive into how I tackled it, along with a few tips for anyone staring down the barrel of a multi-cam 360 project.

The Problem with 360 Color

When you have a ring of RED sensors pointing in every direction, they are never going to see the world the exact same way. One camera is staring straight into a harsh sun; the next is catching the shadowy falloff. Even with perfectly matched settings, lenses have different characteristics, and sensors have micro variances.

When those images are graded, stitched together and pumped through a Disguise media server onto massive screens, any discrepancy in contrast or color balance at the seams creates a harsh, visible line. It shatters the illusion.

Enter the Temp Stitch

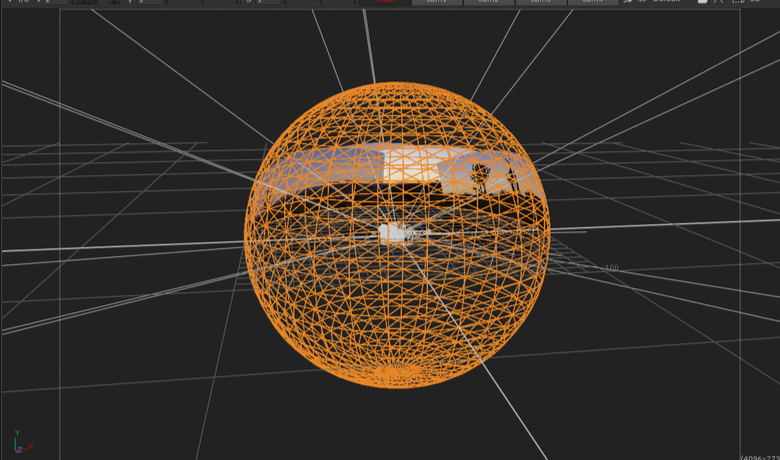
To fix the seams, you have to see the seams. I couldn't wait for the final VFX stitch to come back before doing my grades, so I built a quick-and-dirty temp stitch right in the color bay using Baselight’s 3x3 view mode.

Here are my top tips for managing the madness and making sure your handoffs are buttery smooth:

1. Color Management is Non-Negotiable

Before you even look at a seam, your color management pipeline needs to be bulletproof. Working in a scene-referred space (like ACES) is an absolute lifesaver here. By transforming all those RED raw files into a massive, unified working space, you ensure the math behind your exposure and contrast adjustments behaves predictably across the entire array. The next step is to build camera specific LUT’s that correct any sensor and lens discrepancies.

2. Flatten the Field (Beware the Vignette)

This is the silent killer of 360 stitching: lens vignetting. The center of a lens is always brighter than the edges. When you place two edges side-by-side in a stitch, you get a dark band down the middle of your overlap.

  • The Fix: Before you do any creative grading, you have to build a spatial correction to flatten the luminance across the sensor. Lift those edges so the base exposure is uniform corner-to-corner.

3. Grouping is Great, but Trims are Better

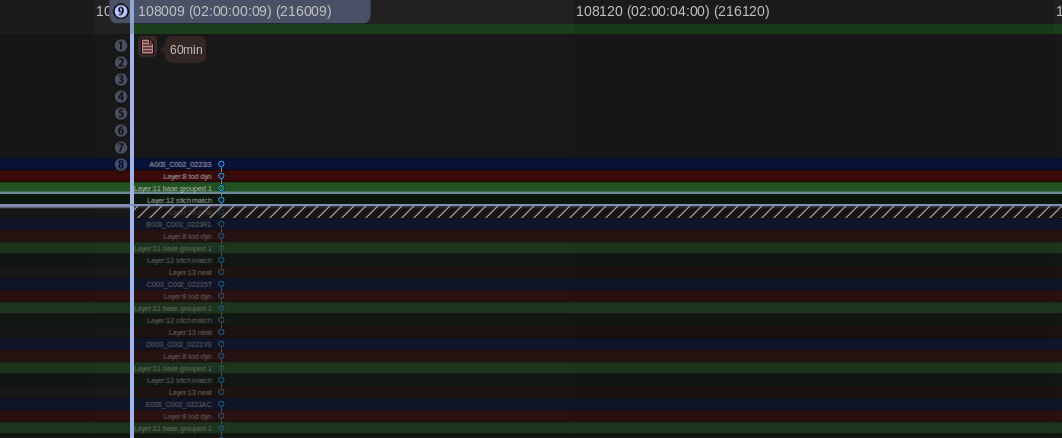
It’s tempting to group all the cameras together, slap a primary grade on, and call it a day. Do apply your base look at the group level, but the real work happens on the individual clip trims. The stack consisted of a grouped operator followed by and individual trim layer. I also added a key framed dynamic layer to control shadow detail as the sun set. You have to ride the offset and pivot on the adjacent cameras to feather the differences in lighting environments.

4. Build a Split-Screen Matrix

My temp stitch wasn't about perfect geometry; it was about perfect color geometry. I set up a workspace where I could view the overlapping edge of Camera A directly against the overlapping edge of Camera B in a split-screen. I just worked my way around the circle: A to B, B to C, C to D... all the way back to A. If A matches B, and B matches C, but the final camera doesn't match A, you have to go back and figure out where your exposure, contrast or color drifted.

5. Output for Disguise: The Final Bake to Notch LC

The Disguise system is incredibly powerful for mapping content to complex surfaces, but it demands technical precision. By doing the temp stitch and mocking up the final layout, I could render out test patches that matched the exact specs the Disguise operators needed.

Once the temp stitch did its job and the final grades were locked, it was time for the heavy lifting. The sheer volume of pixels in a 360 array is staggering, and for this project, we were delivering eight final outputs, each demanding pristine 4K resolution.

To get there, the pipeline was a two-step process. First, the grade was rendered out of the color bay as 10-bit DPX sequences. I love DPX for this stage because it is bulletproof—giving you uncompressed, perfect frames. Plus, if a render machine hiccups on frame 40,000, you don't lose a massive video file, you just re-render that single frame and move on.

However, if you try to make a media server play back eight simultaneous streams of 4K uncompressed DPX frames, it will simply say “computer says no.” To solve this, we took those massive image sequences straight into Adobe Media Encoder to crunch them down into the Notch LC codec. Today it’s built into Baselight, Mistika, etc, but at the time Adobe is what we needed to use. Notch is a 10-bit, GPU-accelerated video codec built specifically for media servers. It retains the immense visual fidelity and color depth of our DPX masters but plays back like absolute butter.

The Wrap-Up

Working with 360 rigs is a unique puzzle. It forces you to think spatially about your color pipeline. Building that temp stitch added a little extra time upfront, but it saved us from a mountain of headaches (and notes) on the backend. The REDs delivered gorgeous data, the fashion was couture and wonderful, and the seams? Completely invisible.

Thanks for reading and happy grading!

JD


How to - Add a LUT in Avid Media Composer

There are several ways to load LUTs into Avid Media Composer:

1. Through Source Settings:

  • Right-click on a clip in your bin or timeline.  

  • Select "Source Settings."  

  • Under the "Color Encoding" tab, go to "Color Adapter Type."  

  • Click on the dropdown menu and choose "User Installed LUTs." You can add LUTs you have already loaded to the source clip and hit “Apply”

  • To load a LUT click Color Management Settings and then click “Select LUT file”

  • Browse your LUT file's location (.cube or .lut format) and select it.

  • Click "Open" to load the LUT.

2. Through Color Management Settings:

Color Management Settings
  • Go to "Settings" in the menu bar.

  • Select "Color Management."  

  • Under the "Project" or "Shared" tab (depending on where you want the LUT to be available), click "Select LUT File."  

  • Browse for your LUT file and select it.  

  • Click "Open" to load the LUT.  

3. Using the "Color LUT" Effect:

  • Go to the "Effects" tab in the Effect Palette.

  • Under "Image" effects, find and drag the "Color LUT" effect onto your clip in the timeline.  

  • In the Effect Editor, click on the dropdown menu next to "LUT File" and choose your loaded LUT.

Avid LUT Effect on Filler track

Additional Tips:

  • LUTs should be in either .cube or .lut format to be compatible with Avid.

  • Make sure to place the LUT files in a location you can easily access and remember.

  • You can organize your LUTs by creating subfolders within the Avid LUTs directory.

  • Shared LUTs are available to all projects, while project-specific LUTs are only accessible within the current project.

For more detailed instructions and visual guides, you can refer to these resources:

I hope this helps! Let me know if you have any other questions.

How To - Dolby Vision

Dolby Vision - How To and Best Practices


What is Dolby Vision

Dolby Vision is a way to dynamically map HDR to different display targets. At its core, the system analyzes your media and transforms it to ranges less than your mastering target, typically SDR 100 nits.

Project Setup

The first step is to license your machine. Once that is in place you need to set up your project. Go into settings and set your CMU(Content Mapping Unit) version. Back in the day, we used an external box, but nowadays the software does it internally. You will also need to set which version. V4 is the current iteration whereas V2.9 is a legacy version that some older TVs use. Finally set your Mastering Display. That is a Sony x300 in my case which is set up for PQ P3 D65 1000 nits.

Baselight Project Setup

Resolve Project Setup

It’s not what you said, it’s your tone

The goal is to make our HDR master look good on an SDR display. To do this we need to tone map our HDR ranges to the corresponding SDR ranges. This is a nonlinear relationship and our shadows mid-tones and highlights will land in the wrong areas if we don’t tone map them first. See below for an example of an SDR image that has not been tone mapped correctly. You can see the highlights are way too hot. Now we could use a curve and shape our image to a discreet master for SDR, but most studios and streamers are requesting a Dolby delivery regardless if a separate SDR grade was made. Plus, Dolby does a pretty decent job of getting you there quickly since the v4 release.

The first step is to analyze your footage. This will result in three values that will set a tone curve, min, max, and average. These values inform the system how to shape the curve to get a reasonable rendering of your HDR master in SDR.

Image courtesy of Dolby

Tone mapping from HDR to SDR

What we are trying to do here is fit 10 pounds of chicken into an 8-pound bag. Something has to give, usually the bones but the goal is to keep as much chicken as you can. Rather than toss data out, we instead compress it. The system calculates the min, max, and average light levels. The idea is to keep your average or the “meat and potatoes” of your shot intact while compressing the top and bottom ranges. The end result is an SDR image that resembles your HDR only flatter.

How a colorist goes about the analysis is just as important as the analysis itself. This is going to get into a religious debate more than a technical one and everything from this point on is my opinion based on my experiences with the tech. Probably not what Dolby would say.

The original design of the system wanted you to analyze every shot independently. The problem with this approach is it can take a consistent grade and make it inconsistent depending on the content. Say you had two shots from the same scene.

One side of the coverage was shooting the character with a blown-out window behind them. The other side shoots into the darker part of the house. Now even though you as a colorist have balanced them to taste, the Dolby analysis will have two very different values for these shots. To get around this, I find it is better to average the analysis for each scene vs doing independent shots. The first colorist I saw work this way was my good friend and mentor Walter Volpatto. He went toe to toe with Dolby because his work was getting QC rejections based on his method. He would analyze only a grey ramp with the d-min and d-max values representing his media and apply that to his entire timeline. His thought process was if it was one transform to HDR it should be one transform down.

Most studio QC operations now accept this approach as valid metadata (Thank you, Wally!) While I agree with his thought process, I tend to work based on one analysis per scene. Resolve has this functionality built in. When I’m working in Baselight I set it up this way and copy the scene averaged analysis to every shot in preparation for the trim.

Scene average analysis in Baselight.

Setting the tone

Now that your analysis is complete it’s time to trim. First, you need to set what display output your trim is targeting and the metadata flag for the intended distribution. You can also set any masking that was used so the analysis doesn’t calculate the black letterbox pixels. The most common targets are 709 100nits, P3 48nits, and PQ 108nits. The 709 trim is for SDR home distribution whereas the other two are for theatrical distribution. The reason we want to keep the home video and cinema trims separate is that displays that fall in between two trim targets will be interpolated. You can see that the theatrical 108nit trim is very close to the home video 100nit trim. These two trims will be represented very differently due to the theatrical grade being intended for a dark theater vs home viewing with dim surround lighting conditions. Luckily Dolby recognized this and that is why we have separation of church and state now. The process for completing these trims is the same though, only the target changes.

Trim the fat

Saturation plus lift gamma gain is the name of the game. You also have advanced tools for highlight clipping and mid-tone contrast. Additionally, you have very basic secondary controls to manipulate the hue and saturation of the six vectors.

Baselight Dolby trim controls.

Resolve Dolby trim controls.

These secondary controls are very useful when you have extremely saturated colors that are on the boundaries of your gamut. I hope Dolby releases a way to only target the very saturated color values instead of the whole range of a particular vector, but for now, these controls are all we have.

Mid tone offset

Another tool that affects the analysis data but could be considered a trim is the mid-tone offset. A good way to think about this tool is a manual shifting of what your average is. This slides the curve up or down from the midpoint.

I usually find the base analysis and subsequent standard conversion a little thick for my taste. I start by finding a pleasing trim value that works for a majority of shots. Then I ripple that as a starting place and trim from there until I’m happy with the system’s output. The below before and after shows the standard analysis output vs where I ended up with the trim values engaged.

It’s time to export once you are happy with the trims for all of your needed outputs. This is done by exporting the XML recipes that when paired with your PQ master will create all the derivative versions.

XML

Here are two screenshots of where to find the XML export options in Baselight and Resolve.

Rightclick on your timeline -> timelines - >export -> Dolby XML

Shots View -> Gear Icon ->Export Dolby Vision Metadata… This will open a menu to let you choose your location and set primaries for the file.

The key here is to make sure that you are exporting an XML that reflects your deliverable, not your DSM. For example, I typically export PQ P3 D65 tiffs as the graded master files. These are then taken into Transkoder, placed into a rec 2020 container, and married with the XML to create an IMF. It’s important to export a rec2020 XML instead of a P3 one so that when it is applied to your deliverable it yields the intended results. You can always open your XML in a text editor if you are unsure of your declared primaries. I have included a screen grab of what the XML should look like for the Rec2020 primaries on the left and P3 primaries on right. Always go by the numbers because filenames can lie.

Rec2020 XML vs P3 D65

There is beauty in the simplicity of this system. Studios and streamers love the fact there is only one serviceable master. As a colorist, I love the fact that when there is a QC fix you only need to update one set of files and sometimes the XML. That’s a whole lot better than in the height of the 3D craze where you could have up to 12 different masters and that is not even counting the international versions. I remember finishing Katie Perry’s “Part of Me” in 36 different versions. So in retrospect, Dolby did us all a great service by transmuting all of those versions we used to painstakingly create into one manageable XML sidecar file.

Thanks for reading

I bet in the future these trim passes end up going the way of the 4x3 version. Especially with the fantastic HDR displays available from Samsung, Sony, and LG at continually lower price points. Remember the Dolby system only helps you at home if it is something other than what the media was mastered at. Until then, I hope this helps.

Check out this Dolby PDF for more information and deeper dive into the definition of the various XML levels. As always thanks for reading.

-JD