Dolby Vision - How To and Best Practices
What is Dolby Vision
Dolby Vision is a way to dynamically map HDR to different display targets. At its core, the system analyzes your media and transforms it to ranges less than your mastering target, typically SDR 100 nits.
Project Setup
The first step is to license your machine. Once that is in place you need to set up your project. Go into settings and set your CMU(Content Mapping Unit) version. Back in the day, we used an external box, but nowadays the software does it internally. You will also need to set which version. V4 is the current iteration whereas V2.9 is a legacy version that some older TVs use. Finally set your Mastering Display. That is a Sony x300 in my case which is set up for PQ P3 D65 1000 nits.
Baselight Project Setup
Resolve Project Setup
It’s not what you said, it’s your tone
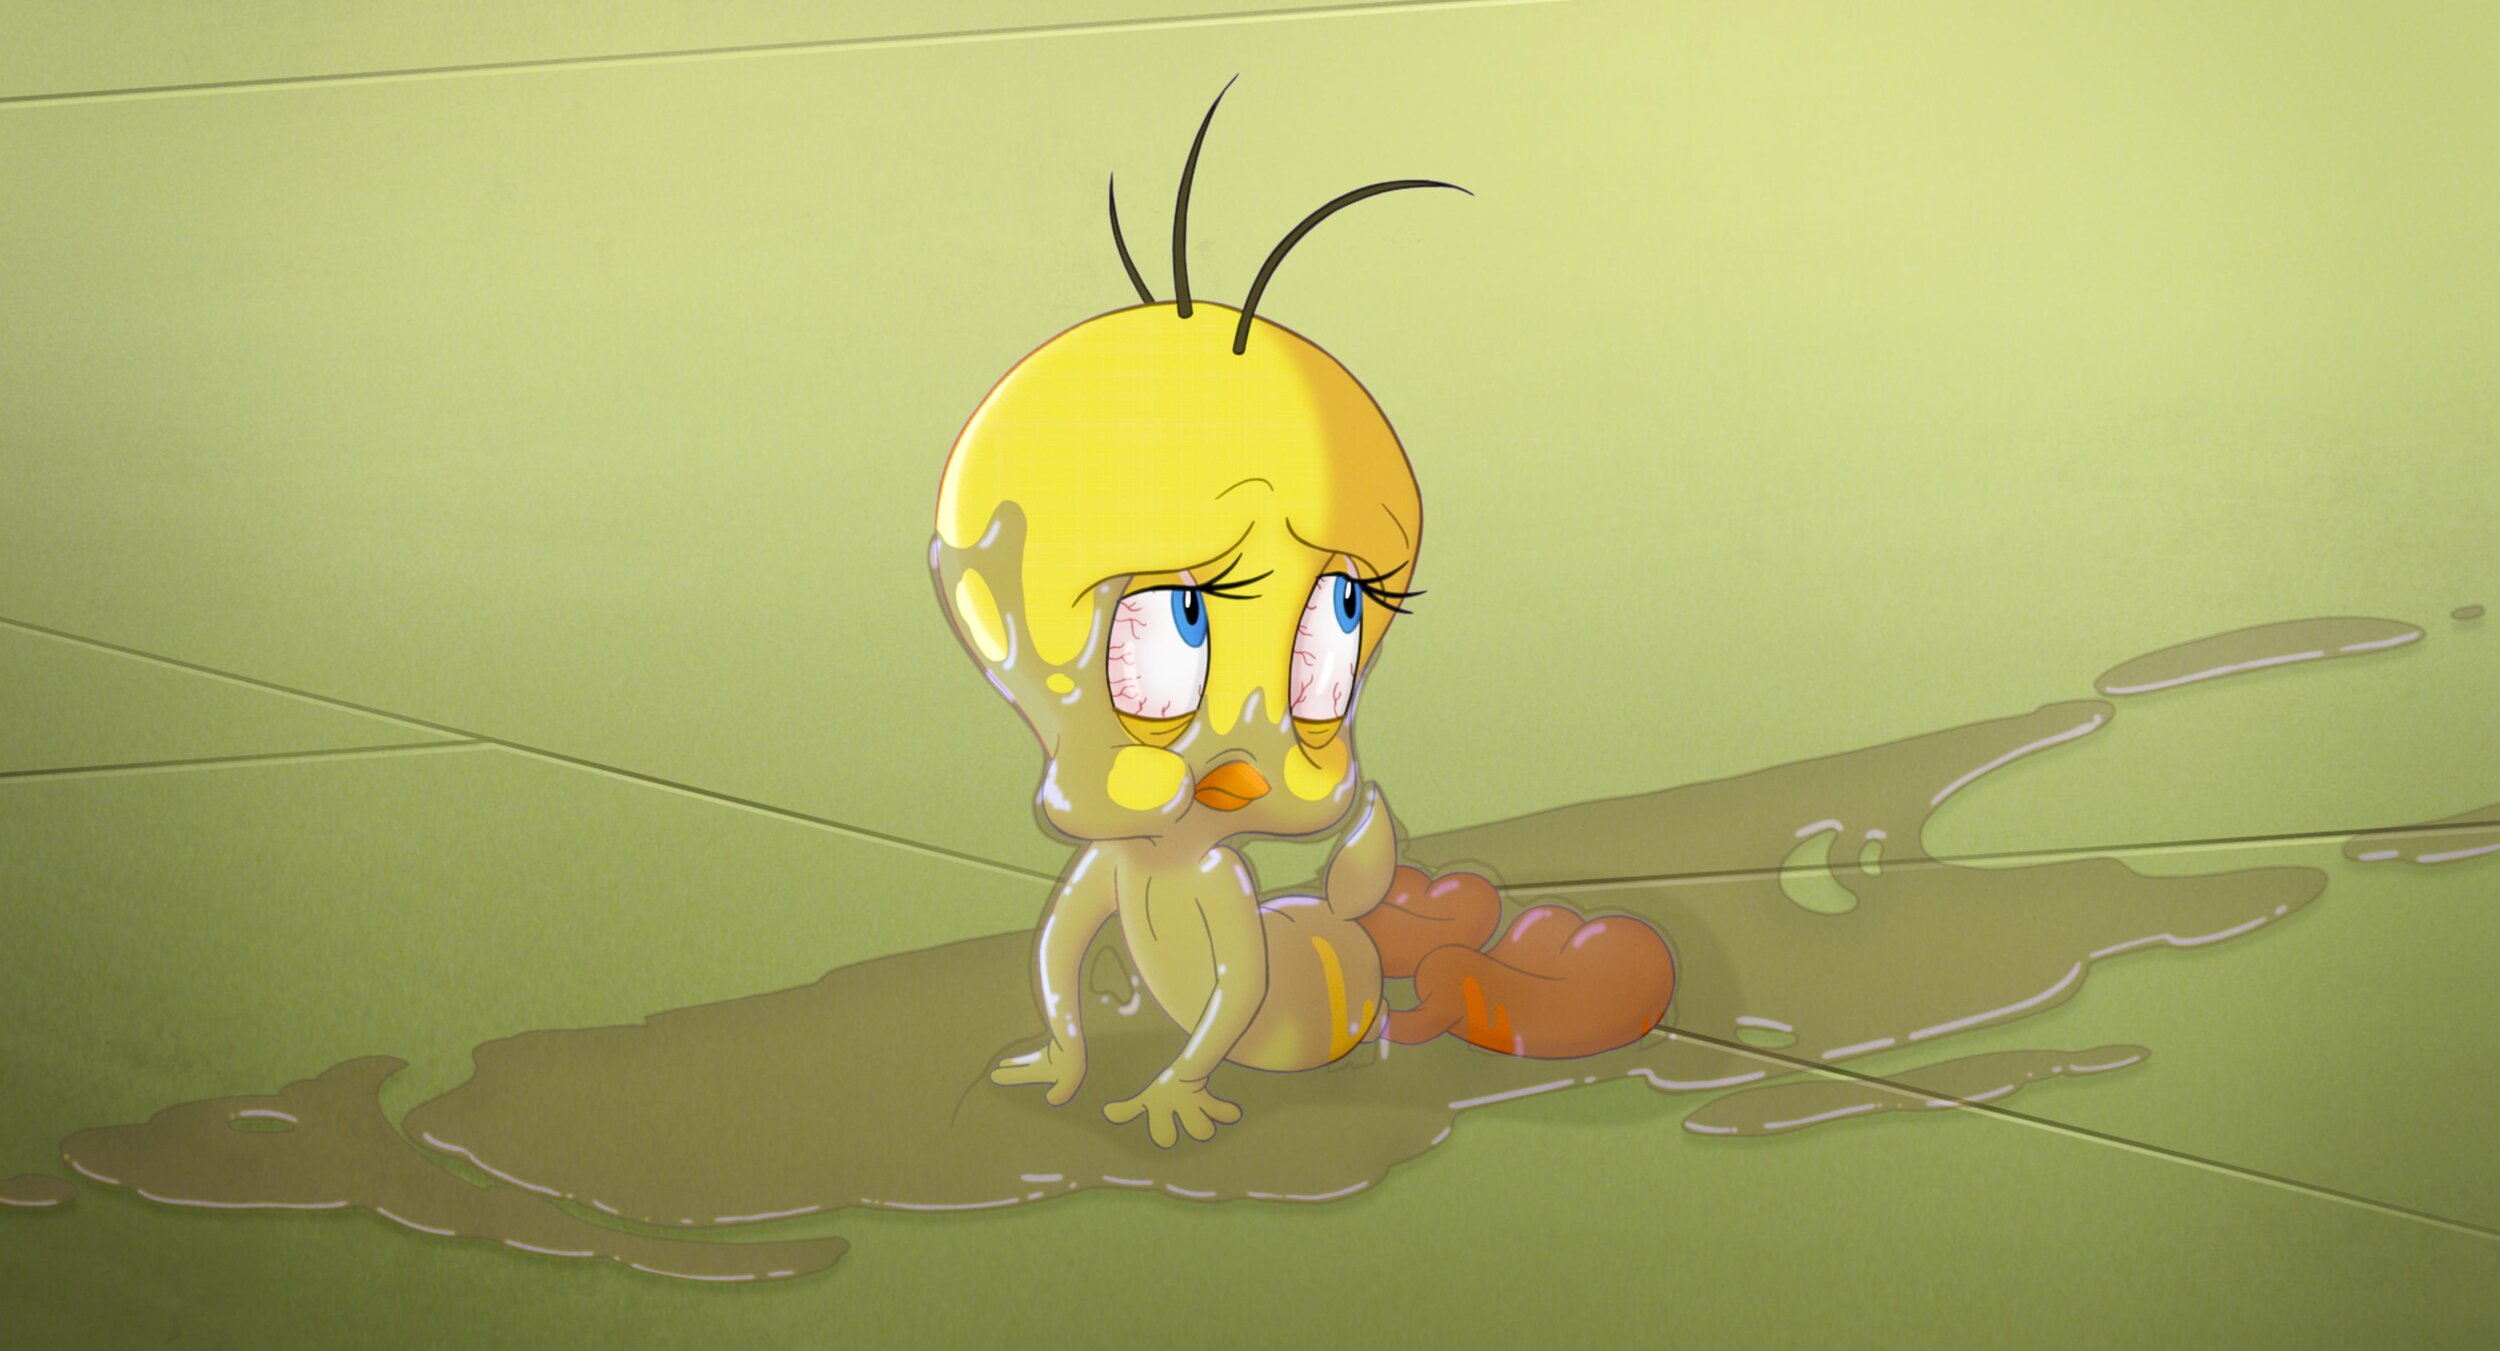
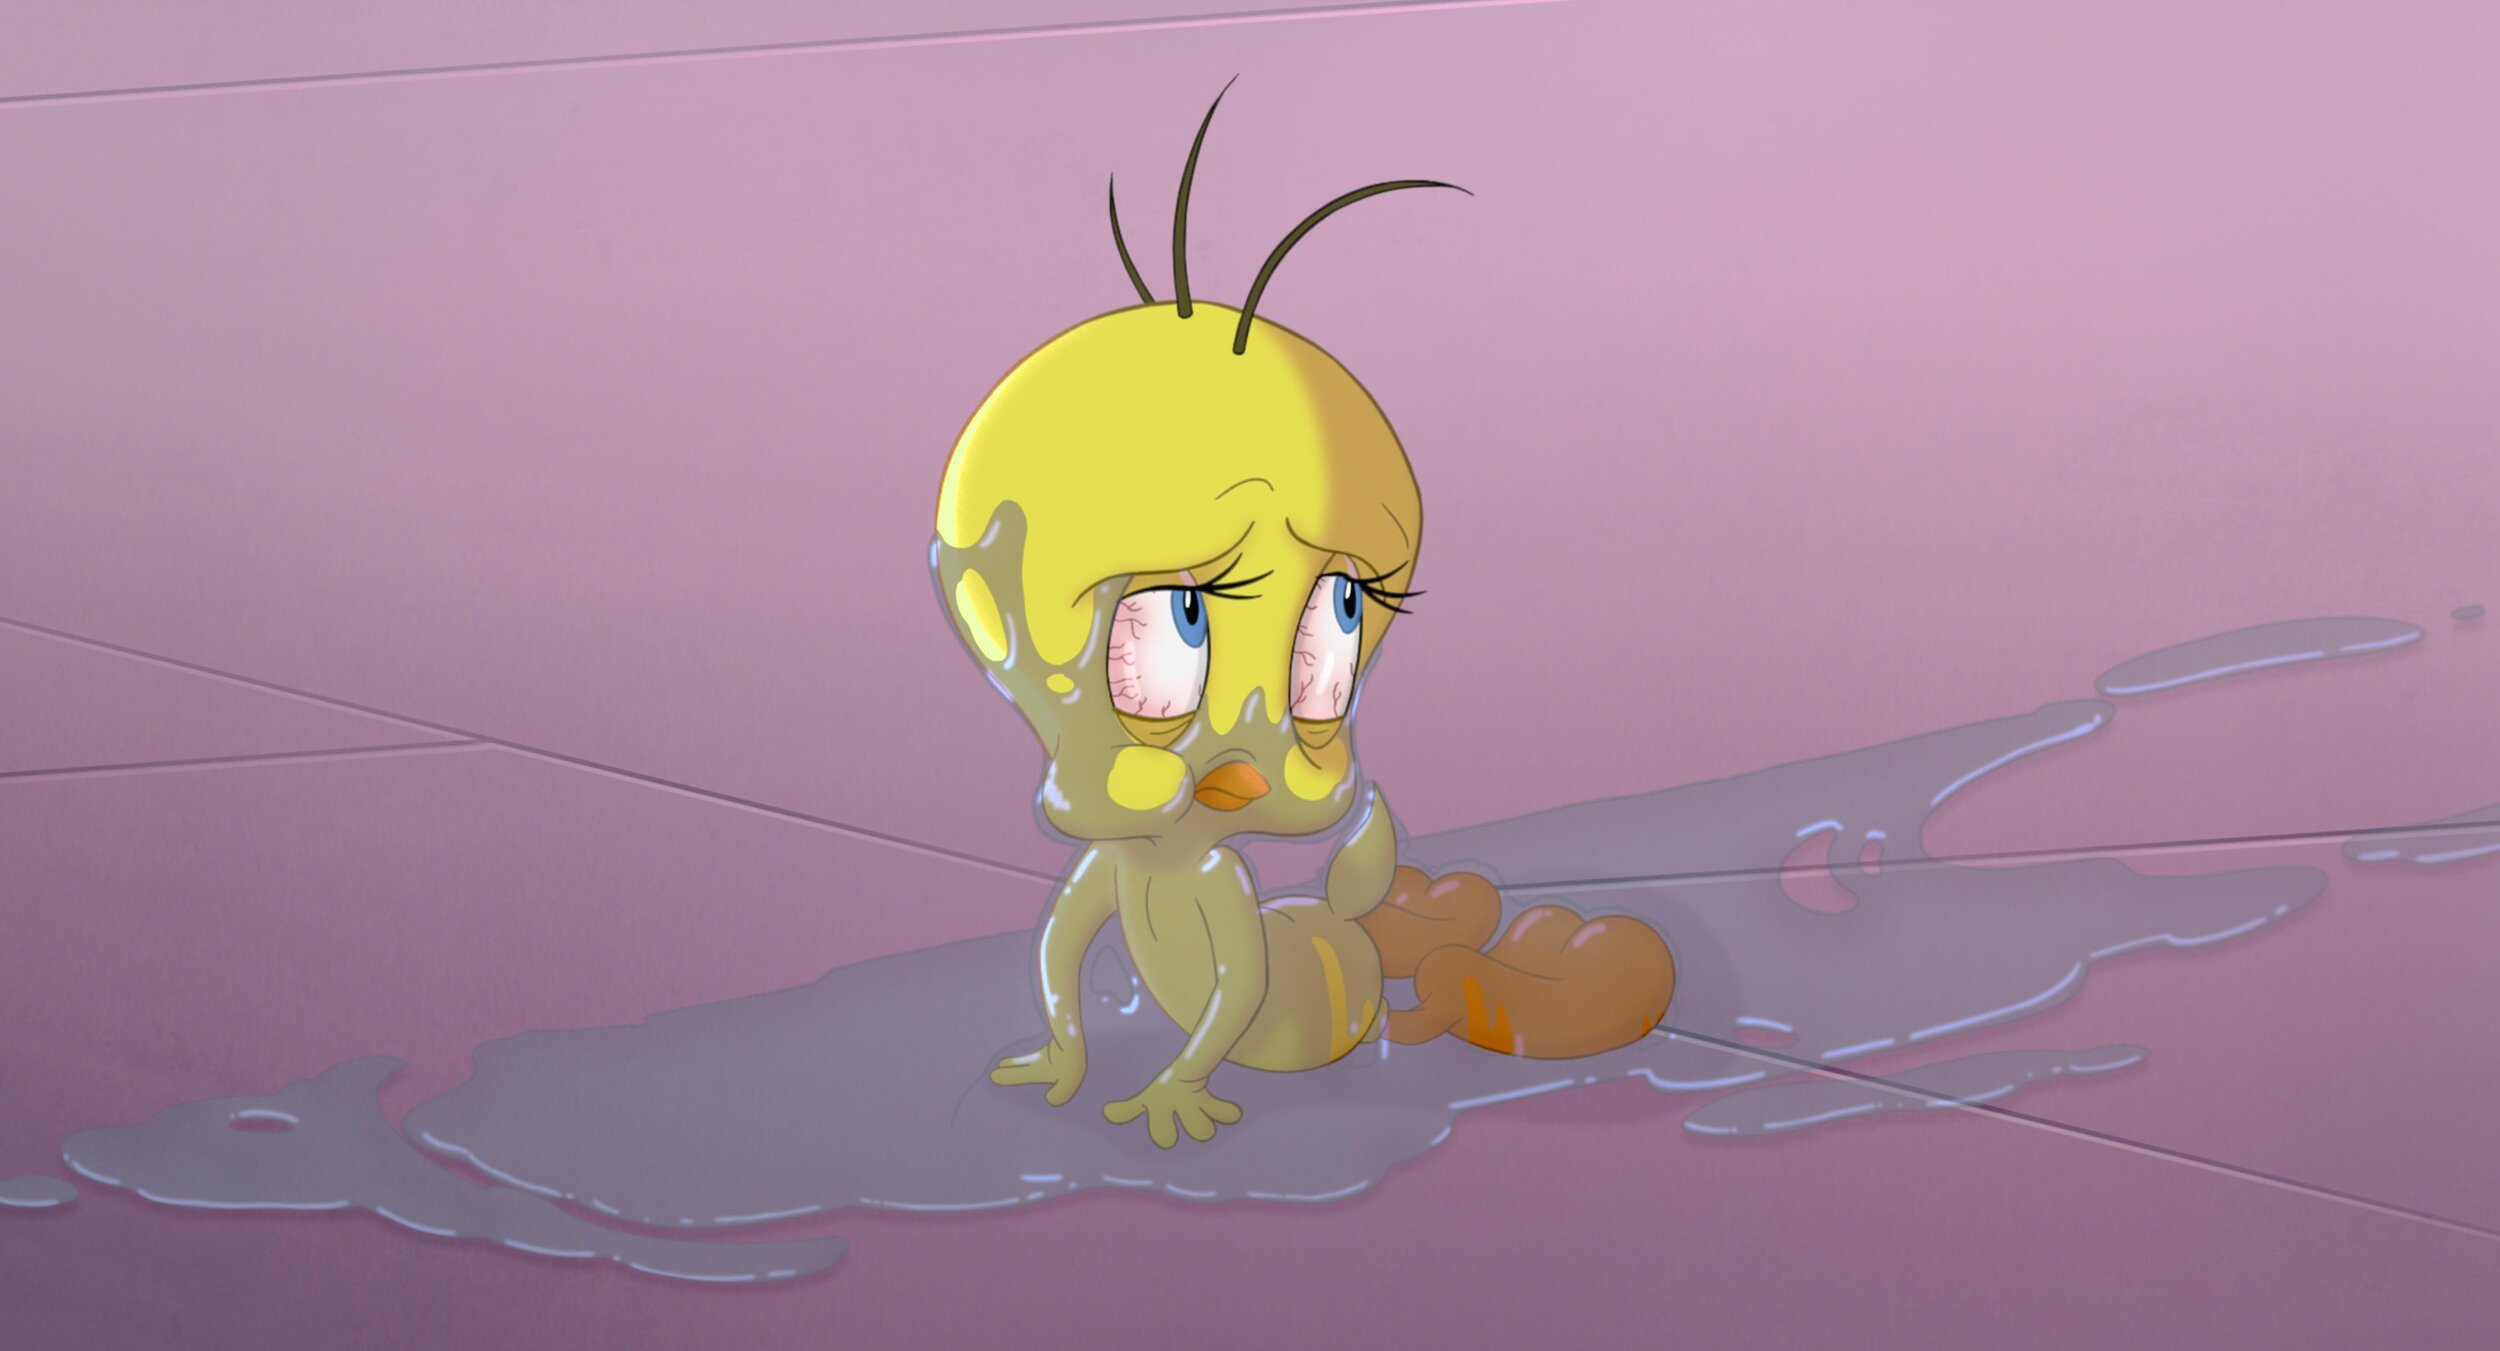
The goal is to make our HDR master look good on an SDR display. To do this we need to tone map our HDR ranges to the corresponding SDR ranges. This is a nonlinear relationship and our shadows mid-tones and highlights will land in the wrong areas if we don’t tone map them first. See below for an example of an SDR image that has not been tone mapped correctly. You can see the highlights are way too hot. Now we could use a curve and shape our image to a discreet master for SDR, but most studios and streamers are requesting a Dolby delivery regardless if a separate SDR grade was made. Plus, Dolby does a pretty decent job of getting you there quickly since the v4 release.
The first step is to analyze your footage. This will result in three values that will set a tone curve, min, max, and average. These values inform the system how to shape the curve to get a reasonable rendering of your HDR master in SDR.


Image courtesy of Dolby
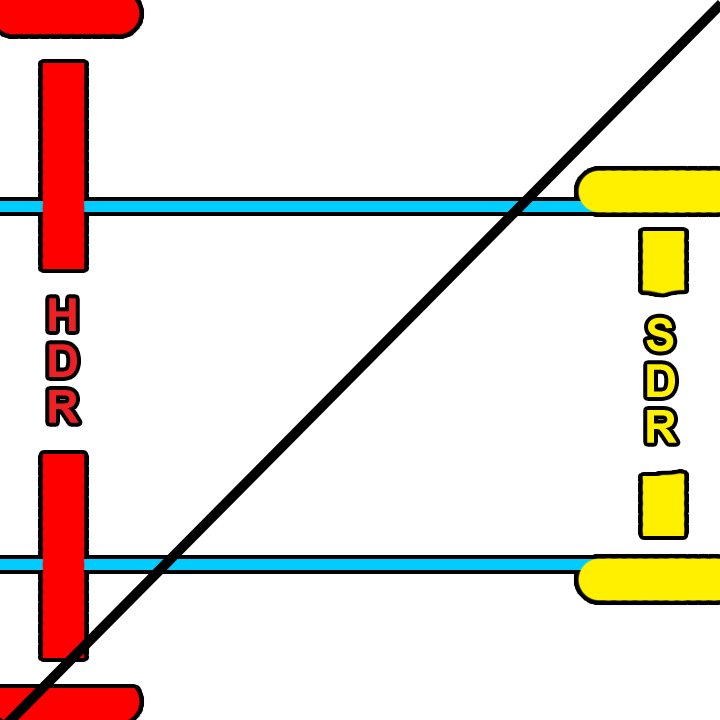
Tone mapping from HDR to SDR
What we are trying to do here is fit 10 pounds of chicken into an 8-pound bag. Something has to give, usually the bones but the goal is to keep as much chicken as you can. Rather than toss data out, we instead compress it. The system calculates the min, max, and average light levels. The idea is to keep your average or the “meat and potatoes” of your shot intact while compressing the top and bottom ranges. The end result is an SDR image that resembles your HDR only flatter.

How a colorist goes about the analysis is just as important as the analysis itself. This is going to get into a religious debate more than a technical one and everything from this point on is my opinion based on my experiences with the tech. Probably not what Dolby would say.
The original design of the system wanted you to analyze every shot independently. The problem with this approach is it can take a consistent grade and make it inconsistent depending on the content. Say you had two shots from the same scene.
One side of the coverage was shooting the character with a blown-out window behind them. The other side shoots into the darker part of the house. Now even though you as a colorist have balanced them to taste, the Dolby analysis will have two very different values for these shots. To get around this, I find it is better to average the analysis for each scene vs doing independent shots. The first colorist I saw work this way was my good friend and mentor Walter Volpatto. He went toe to toe with Dolby because his work was getting QC rejections based on his method. He would analyze only a grey ramp with the d-min and d-max values representing his media and apply that to his entire timeline. His thought process was if it was one transform to HDR it should be one transform down.
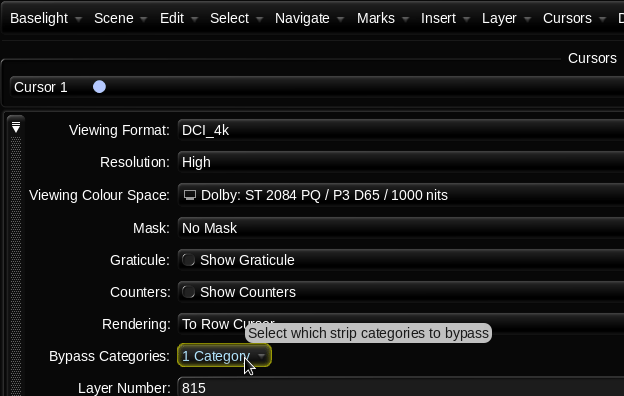
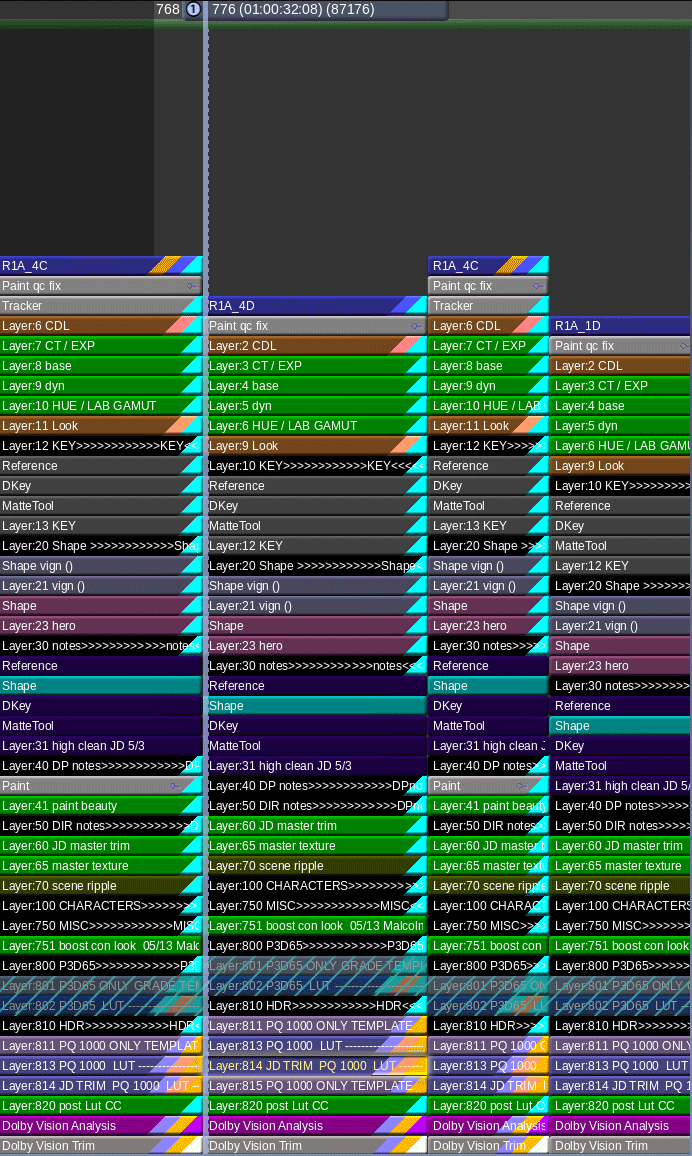
Most studio QC operations now accept this approach as valid metadata (Thank you, Wally!) While I agree with his thought process, I tend to work based on one analysis per scene. Resolve has this functionality built in. When I’m working in Baselight I set it up this way and copy the scene averaged analysis to every shot in preparation for the trim.
Scene average analysis in Baselight.
Setting the tone
Now that your analysis is complete it’s time to trim. First, you need to set what display output your trim is targeting and the metadata flag for the intended distribution. You can also set any masking that was used so the analysis doesn’t calculate the black letterbox pixels. The most common targets are 709 100nits, P3 48nits, and PQ 108nits. The 709 trim is for SDR home distribution whereas the other two are for theatrical distribution. The reason we want to keep the home video and cinema trims separate is that displays that fall in between two trim targets will be interpolated. You can see that the theatrical 108nit trim is very close to the home video 100nit trim. These two trims will be represented very differently due to the theatrical grade being intended for a dark theater vs home viewing with dim surround lighting conditions. Luckily Dolby recognized this and that is why we have separation of church and state now. The process for completing these trims is the same though, only the target changes.
Trim the fat
Saturation plus lift gamma gain is the name of the game. You also have advanced tools for highlight clipping and mid-tone contrast. Additionally, you have very basic secondary controls to manipulate the hue and saturation of the six vectors.
Baselight Dolby trim controls.
Resolve Dolby trim controls.
These secondary controls are very useful when you have extremely saturated colors that are on the boundaries of your gamut. I hope Dolby releases a way to only target the very saturated color values instead of the whole range of a particular vector, but for now, these controls are all we have.
Mid tone offset
Another tool that affects the analysis data but could be considered a trim is the mid-tone offset. A good way to think about this tool is a manual shifting of what your average is. This slides the curve up or down from the midpoint.
I usually find the base analysis and subsequent standard conversion a little thick for my taste. I start by finding a pleasing trim value that works for a majority of shots. Then I ripple that as a starting place and trim from there until I’m happy with the system’s output. The below before and after shows the standard analysis output vs where I ended up with the trim values engaged.


It’s time to export once you are happy with the trims for all of your needed outputs. This is done by exporting the XML recipes that when paired with your PQ master will create all the derivative versions.
XML
Here are two screenshots of where to find the XML export options in Baselight and Resolve.
Rightclick on your timeline -> timelines - >export -> Dolby XML
Shots View -> Gear Icon ->Export Dolby Vision Metadata… This will open a menu to let you choose your location and set primaries for the file.
The key here is to make sure that you are exporting an XML that reflects your deliverable, not your DSM. For example, I typically export PQ P3 D65 tiffs as the graded master files. These are then taken into Transkoder, placed into a rec 2020 container, and married with the XML to create an IMF. It’s important to export a rec2020 XML instead of a P3 one so that when it is applied to your deliverable it yields the intended results. You can always open your XML in a text editor if you are unsure of your declared primaries. I have included a screen grab of what the XML should look like for the Rec2020 primaries on the left and P3 primaries on right. Always go by the numbers because filenames can lie.
Rec2020 XML vs P3 D65
There is beauty in the simplicity of this system. Studios and streamers love the fact there is only one serviceable master. As a colorist, I love the fact that when there is a QC fix you only need to update one set of files and sometimes the XML. That’s a whole lot better than in the height of the 3D craze where you could have up to 12 different masters and that is not even counting the international versions. I remember finishing Katie Perry’s “Part of Me” in 36 different versions. So in retrospect, Dolby did us all a great service by transmuting all of those versions we used to painstakingly create into one manageable XML sidecar file.
Thanks for reading
I bet in the future these trim passes end up going the way of the 4x3 version. Especially with the fantastic HDR displays available from Samsung, Sony, and LG at continually lower price points. Remember the Dolby system only helps you at home if it is something other than what the media was mastered at. Until then, I hope this helps.
Check out this Dolby PDF for more information and deeper dive into the definition of the various XML levels. As always thanks for reading.
-JD