How to - VR 180 Video Files

Recently a few VR jobs came across my desk. I had done some equirectangular grading in the past, but it was always for VFX plates, Dome Theaters, or virtual production sets. These recent projects were different because they were purposely shot for 180 VR. Sorry, no looking back over your shoulder. The beauty of this format is that it brings back some of the narrative language that we have cultivated over 100+ years of cinema. We can direct your eye through shadow and light or pull your attention with a sound effect and sudden action. All while not having to worry if you are looking in the right direction.

I thought it would be a good idea to share what I have learned working with this type of immersive content. It’s all out there on the web but hopefully, this pulls it all together in one place and saves all of you a bunch of googling.

It all starts with a stitch

First, you will need to choose a rig. There are many off-the-shelf kits you can buy or you can go the homebrew route and cobble together a few cameras. There are also some interesting standalone devices that save you from having to use/manage multiple cameras. In all cases, there will be some post-processing needed. You will need stitching software like Mistika VR or Cara VR for multiple camera rigs.

Stitching is the process of combining multiple cameras together, color balancing them, and then feathering the overlapping pixels to create one seamless equirectangular image. There are a lot of tutorials on stitching and this post is not that.

6 cameras stitched

The red lines are the edges. The green lines are where the feather starts for the overlap.

Equidistant Fisheye

Extremely wide fisheye setups will need to be converted from equidistant fisheye to equirectangular

Want to avoid stitching all together? Use a very wide-angle lens. There are extremely wide fisheye setups that can capture more than 180 degree field of view. These will need to be converted from equidistant fisheye to equirectangular, but other than that, no stitching or post-processing is needed. Canon has just recently released a fantastic dual fisheye product that further simplifies capture. No matter the setup the end result of the post process will be a 2:1 canvas with each eye being a 1:1 equirectangular image placed side by side. This is probably a good time to talk about what an equirectangular image is.

Equirectangular Projection

This type of spherical visualization is basically the map of the globe that you had in school. It’s what happens when you take a sphere, map that to a cylinder, and unroll the cylinder to a flat projection. That is a gross oversimplification, but a good way to visualize what is going on nonetheless. Please see the equations below if you are coding something or if you are just a maths fan.

Transform Definition

Spherical to Planar Transform

This is the concept of 360 video. We work with it in a flat plane during post. Same idea for 180 VR video, but just one hemisphere instead. Click to see higher quality.

Ok Cool, I have VR Videos… Now what?

At this point, your videos are ready for post. I would consider everything up to this point dailies. Now it’s time to edit. All the usual editors we use daily can cut together these video files, but some are better suited than others. Premiere would be my first choice, with Mistika Boutique being a close second. In my workflow, I use both since the two tools have different strengths and weaknesses. Premiere has a clever feature that uses Steam VR and feeds your timeline to a headset. This is indispensable, in my opinion, for that instant feedback one needs while cutting and grading. VR is a different beast. Straight cuts, unless carefully planned out, can be very jarring if not nausea-inducing. Fades work well but are sort of the VR equivalent of “if you can’t solve it dissolve it.” Having all of these transitions live for evaluation and audition in the headset is what separates Premiere from the rest of the pack. SGO has recently released the ability for HMD review similar to Premiere, but I have yet to use the new feature. I will update this post once I take it out for a spin.

9/7/2023 Mistika update

So, I finally took Mistika’s HMD monitoring for a spin. It was super easy to set up. First, you download DEO VR player to your headset. Next, you click the HMD icon in Mistika. This will give an HTTP address with the ip of your machine. Type that into the address bar in DEO VR and ta-da. You end up with super steppy streaming VR video of your current environment.

It was OK to check geometry and color, but It would be hard to use for review. There are a couple of advantages to working this way, though. Multiple headsets are able to connect to the same stream. This is great when you have a room full of folks and everybody in their own headset. With Premiere, we pass the HMD around while everyone else views on the projector or stares at whoever is in the headset, patiently waiting for their turn. Another benefit is remote monitoring. You can technically serve out the ip of your local machine (this will probably need some port forwarding on your router and some VPN shenanigans) to the world. This means someone remote can connect, provided they are on the same network.

Pros

  • Easy setup

  • Multiple viewers at once

  • Remote viewing

  • Instant HMD feedback

Cons

  • Steppy playback

  • Needs a network-attached machine

  • Low resolution to maintain interactivity

Setting up your project

Premiere has a couple of dependencies to enable VR viewing. First, you need to install Steam VR. This is all you need if you are using a Windows Mixed Reality headset. You will need to install the Oculus software if you plan on using the Facebook offerings via Occulus link.

Now that your HMD is set up. Check out this blog post for step-by-step settings to get Premiere ready to edit VR. The settings are the same for 180VR. Just change the Horizontal Capture settings from 360 to 180.

Change “360” to 180 for VR180 editing.

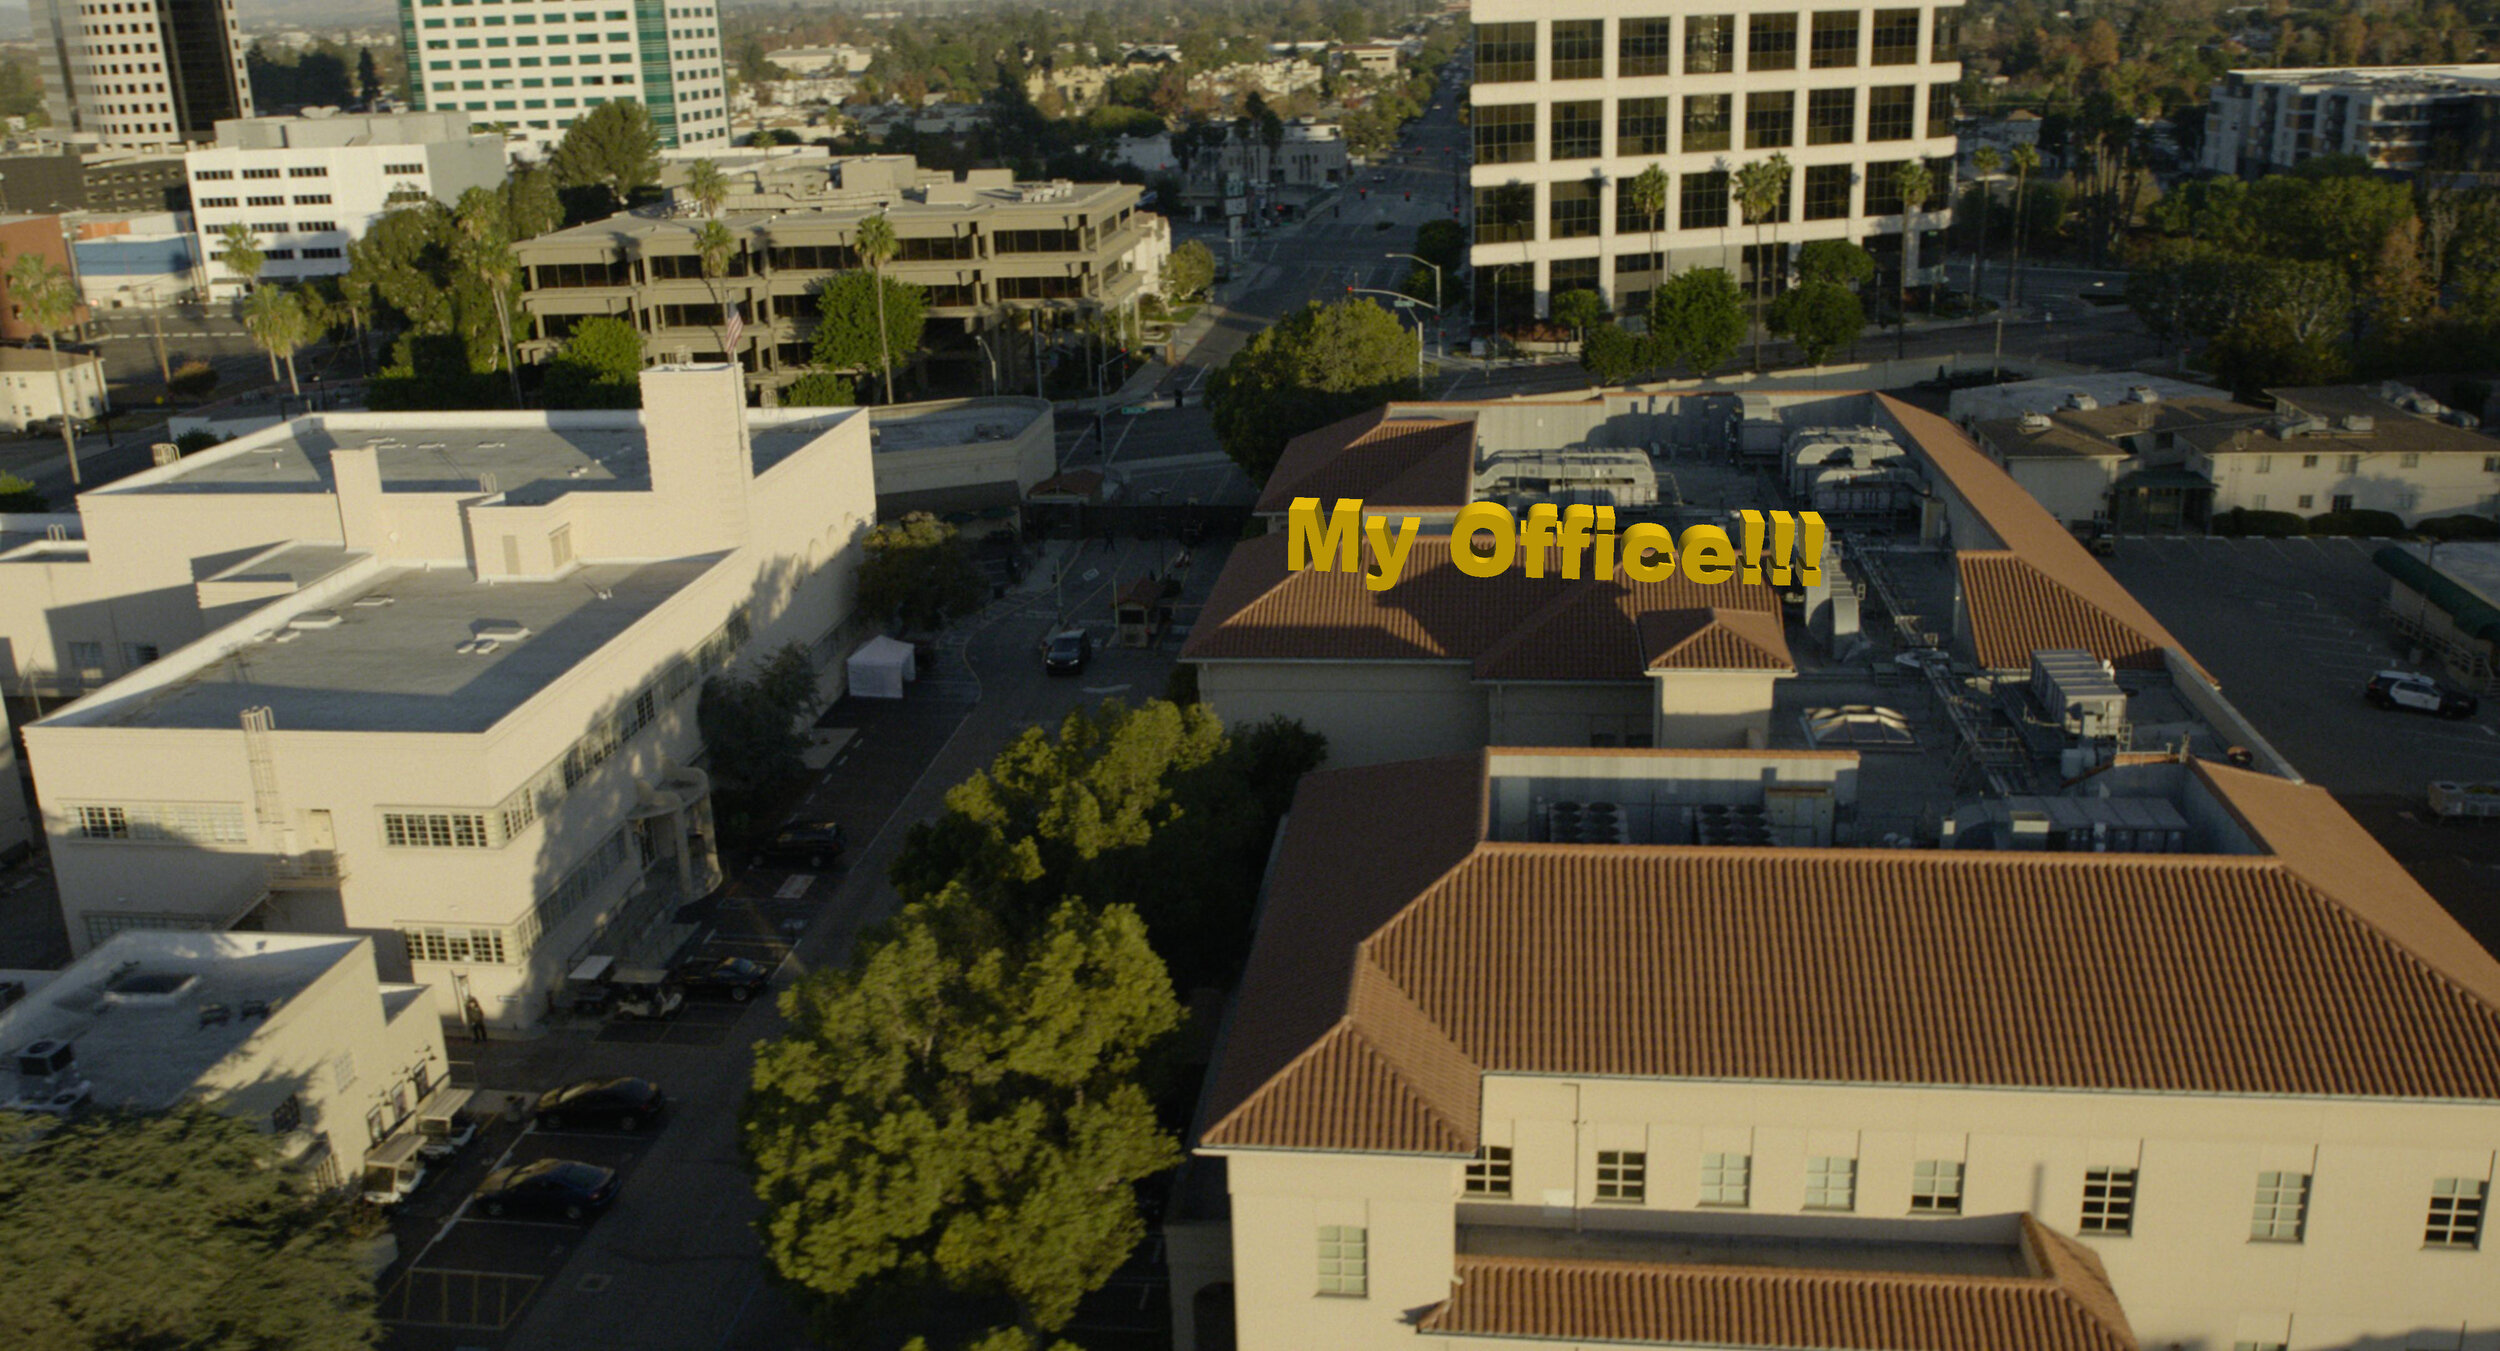
Who’s Daniel and why do I care?

One downside about Premiere is the dreadfully slow rendering of HEVC files. Not to mention the 60mbps limitation. The Adobe dev team knows my feelings on the matter so hopefully, this will be fixed in a future update, but until then here is a crafty workaround. Cinegy is a company that makes a codec called daniel2. They have their own renderer. We don’t really care about their codec but we do like that their Cinegy HEVC render is way faster than Premiere’s native one. Here’s how to install it.

  • download and install

  • go to email and copy the license (it’s free but still needs to be licensed)

  • open the Cinegy license manager and paste the number

  • open a Premiere timeline and, press ctrl m for export, and check to see if Cinegy comes up as an export option.

  • set your bitrate and hit go. I would recommend a bitrate around 130mbps. This allows enough headroom for audio and will not have any issue playing back on the Oculus Quest 2.

The compromise of all this speed is what’s missing from the header of the video file. The file will be missing the flag that lets players know that it is a VR180 file. You can also use Resolve or Mistika for fast HEVC renders as an alternative to Daniel2. No matter how you get your HEVC file you will need to ensure the header is correct. More on this after we sync the audio.

Audio is not my world

I’m a picture guy. Some would even say a big picture guy ;) The one thing I know for sure is that when it comes to audio, I know when it sounds good, but I haven’t a clue on what it takes to get it there. But no more excuses! This is the year that I want to dig deeper. Check back in a few and I hope to update this section with the FB 360 Protools integration information. Until then, the audio is best left to the pros.

Spatial sound can come in different orders with better immersion the higher you go. First-order ambisonics has 4 channels. Second-order has 9, while Third-order files contain 16 tracks. Now it may seem that third order is the way to go, but in my experience, the difference between second-order and third-order isn’t that noticeable on the built-in headset speakers. Then again, I’m, a picture guy. Whatever sound you receive from your mix, you will need to sync it to your HEVC file.

We use the FaceBook 360 app to marry the picture to the spatial sound. The app has some dependencies to install before you can use it.

  1. Python - if you are like me you may have already had this one!

  2. FFMPEG - this link has a tutorial for installing on a Windows machine. Click “code” then “Download Zip.” Uncompress and copy to the FB360 directory

  3. GPAC - make sure you use the legacy 0.8.1 version. This stumped me for a bit the first time.

Now we can run FB360 The first step is to point to your video file. Then choose the right order of ambisonic audio and point to the wav file from the mix. There is also an option to load a standard “head locked” stereo audio track. This can be good for narration, music, or other types of audio that do not need to be assigned a spatial location.

Finally, we hit “Encode.”

It’s not a vaccine but it is an injection

Google VR 180 Creator can be downloaded here. You can’t even find this anymore but it’s super important. There are other options including the original source code for this app, but this little gizmo is by far the easiest way to inject the proper metadata into the header of your HEVC file. This lets players know it’s a side-by-side 180 VR file.
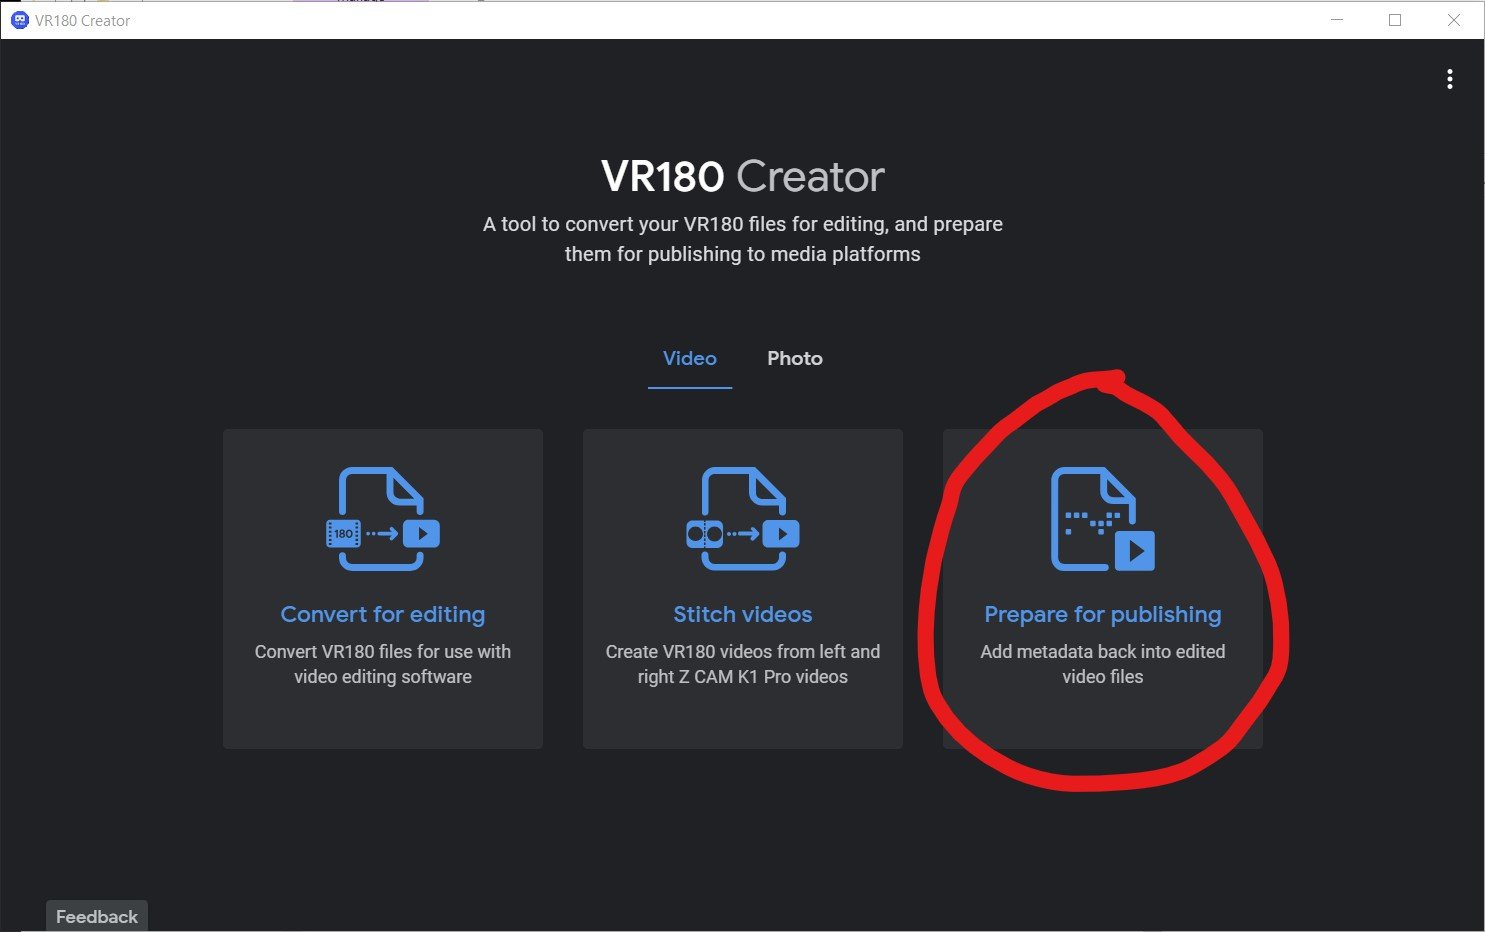
VR180 Creator

Click “Prepare for Publishing. Drag your video in. Set it to side by side and hit export. You will have a new video that has been “injected” with the correct metadata.

How do I view the final product?

Plugin your Oculus Quest into your computer and put it on. Click allow file transfer. Now take off the headset and go to your computer. It will show up as a USB drive. Navigate to the movies directory and simply drag your files across. Now you can unplug your Oculus. Go to Oculus TV/ my media and click your video. If everything was done correctly you are now in a stereo 180 world!

You can also upload to Facebook or Youtube for streaming distribution. Here are two links that contain the specs for both. As with all tech, I’m sure these will change as better headsets are released.

Thank you to the experts that have helped me along the way.

Hopefully, this helps navigate the murky waters of VR just a bit. I’m excited to see what you all create. A big thanks to Hugh Hou for making a ton of really informative videos. A tip of the cap to Tom Peligrini for bringing us all together and leading the charge. I also owe a debt of gratitude to David Raines, for not only introducing Hugh to me but also making sure our VR pictures have all the emotion and immersive sound one could ask for. There’s a pretty great team here at Warner PPCS.

As always, thanks for reading.

JD

Space Jam: A New Legacy - Multiple Worlds, Multiple Deliveries.

Hey Everybody! Space Jam: A New Legacy directed by Malcolm D. Lee is out today. I wanted to take a second to highlight the super slick color workflow which allowed us to work on multiple versions concurrently.

Capture

Space Jam: A New Legacy was masterfully lensed by Salvatore Totino. The two primary capture mediums were 35mm Kodak film and the entire lineup of Arri cameras, mainly the LF. The glass used was Zeiss Supremes and Master Primes. There were also a handful of scans from archival films which were used as plates for animation.

VFX

ILM was running point for the VFXs on this show. Grady Cofer and his team were a dream to work with. There is a reason ILM continues to be the best in class. The knowledge and expertise ILM employs is second to none. Early on Grady connected me with their head of color science, Matthias Scharfenberg. I thought I knew what I was doing when it comes to color science until I saw what Matthias had going on with CTL and Nuke. I learned a lot from our chats. He was super gracious in sending over his Nuke scripts which allowed me to build a Baselight transform that matched ILM’s pipeline. This insured a one-to-one representation of their stellar work.

Two Worlds, One Grade

The show can basically be broken down into two looks. In “Space Jam: A New Legacy” there is the real-world and the Warner Bros Serververse.

We chose an analog celluloid vibe for the real world. The Serververse has a super clean, very 1s and 0s look to it. Most of the real world is shot on film or is Arri Alexa utilizing film emulation curves paired with a grain treatment. Some sequences have a mix of the two. Let me know if you can tell which ones😉.

The look of the digital world changes depending on where the characters are in the Serververse. The base look of the Serververse is the vanilla ACES ODT with restricted primaries in the mid-tones complimented by exaggerating the saturation for highly saturated colors.

All the other looks are riffs off this base LMT with the exception of the library classics. These were graded to look like their existing masters and the new footage was matched in.

Multiple Deliverables, One Timeline

The challenge of this show, beyond the sheer number of VFX and moving parts, was the delivery schedule. The Post Supervisor Lisa Dennis asked to have the theatrical version and the HDR video versions delivered days apart. To hit the dates requested, I graded simultaneously in HDR and SDR. I did most of the heavy lifting in HDR PQ 1000nits. Then I trimmed at 14FL to ensure the reel was ready for filmmaker review. Poping back and forth between outputs was made possible by two great tools. Firstly, I used ACES 1.1 color management to normalize all the different sources into one grading space.

Secondly, I used Baselight’s “Bypass Categories” functionality to if/then the timeline. Basically, I had one timeline that would represent itself differently depending on the output selected. Different layers were toggled for different sources and outputs. The LMTs used often had SDR and HDR versions to further exacerbate the combinations. This was a critical hurdle to overcome and the Baselight gave me the tools to accomplish the organization of a very complicated timeline with ease.

Approvals

The Color sessions were supervised by Malcolm, Sal, and Bob Ducsay. We used Nevion and ClearView for remote sessions, but most of the work was done in-person on the lot here in Burbank. The Animated sequences were supervised by Spike Brandt and Devin Crane. These guys are animation heavyweights, so very cool to be in such good company for an animation nerd like me.

Most of the tweaking on the animation was for continuity fixing. A few of the shots we composited for final in the Baselight. This gave Devin and Spike a little extra creative freedom than a baked shot would have.

Reference for Tweety’s floor

After all the color decisions were made, Malcolm had his final pass and the masters were created. All deliverables from that point were sub-masters from the hero PQ deliverable. These included deliverables such as the Dolby Vision Theatrical version and 709 SDR version derived from the Dolby XML metadata.

Go See It!

Thanks for reading how the look of this candy-colored revival came together. Working on Space Jam was a wild ride. I had to tap into my background in photochemical film processing and knowledge of the latest digital grading techniques to create unique looks for all the different cinematic worlds visited. The film is a nostalgic love letter to the rich history and legacy of the Warner Bros. Studio. I couldn't be more proud of the Warner Color team, especially Leo Ferrini and Paul Lavoie. A big thanks to you guys! Putting this film together was a monumental task and I am ecstatic with end result. Check it out in theaters and on HBO Max today!

Best Practices: Restoring Classics

2020 - The year of Restorations

Now that we seem to be on the other end of the pandemic, I wanted to take a moment to look back on some of the projects that kept me busy. Restorations were the name of game during covid times. With productions shut down and uncertainty in the theatrical marketplace, I had time in my schedule to breathe new life into some of my favorite classics.

Over the last year, I have restored;

Let’s take a look at a couple of these titles and talk about what it means to remaster a film with our contemporary toolset.

The Process

The process for remastering classic titles is very similar to finishing new theatrical work with a couple of additional steps. The first step is to identify and evaluate the best elements to use. That decision is easy for digitally acquired shows from the early 2000’s. In those instances, the original camera files are all that exist and are obviously the best source. Film shows are where it gets particularly ambiguous. There is a debate whether starting from the IP or original negative yields better results. Do we use the original opticals or recreate them from the elements? Black and white seps vs faded camera neg? These questions all need to be answered before you begin the work. Usually I prefer to start with the OCN when available.

Director Scanner

Director Scanner

Arri Scan

Arri Scan

Scanning

Scanning is arguably the most critical part of the process. Quality and success will live or die by the execution of great scans. Image breathing, movement, and general sharpness are issues to look for when evaluating. Scans should not be pretty but rather represent a digital copy of the negative.  In a perfect closed-loop system, a scanned piece of film, once shot back out on a calibrated recorder needs to closely match the original negative.

Digital Restoration

The next step in making an old project shiny and new is to repair any damage to the film from aging or that was inherent in production. this includes painting out splice lines, gate hairs, dirt, and scratches. Film processing issues like breathing or turbulence can also be taken care of in this step. I prefer to postpone flicker removal until the grading step since the contrast will have an effect on the amount of flicker to remove. Some common tools used for restoration include MTI and PF Clean. This work is often outsourced because of the high number of man-hours and labor costs associated with cleaning every frame of film. Some companies that do exceptional restoration work are PrimeFocus and Prasad among others.

Grading

Grading restoration titles is a total sub-discipline from grading as a whole. New theatrical grading starts with references and look development to achieve a certain tone for the film. There is a ton of work that goes into this process. Restoration grading differs since the goal is staying true to that original intent. Not reimagining it. Much like new theatrical grading, a good reference will set you up for success. My preferred reference is a filmmaker-approved answer print.  These were the master prints that best represented the filmmakers’ creative intent.

kinoton-fp30d-696x1024.jpeg

A good practice is to screen the print and immediately set looks for the scans getting as close as possible at 14fl projected. An upgrade to this workflow is to use a projector in the grading suite like a Kinoton. These projectors have remote control and cooling. This allows you to rock and roll the film. You can even freeze-frame and thanks to the built in cooling your film doesn’t burn. Setting up a side-by-side with the film vs digital is the best way to ensure you have a match to the original intent. These corrections need to happen using a good color management system. Aces for example has ODTs for theatrical 48nits which is the equivalent of 14fl. Once you have a match to the original, the enhancement can start.

There would be no point in remastering if it was going to look exactly like the existing master. One great reason to remaster is to take advantage of new advancements in HDR and wide color gamut formats. Film was the original HDR format containing 12 stops of range. The print was the limiting factor, only being able to display 8 of those stops. By switching the ODT to PQ P3D65, we can take advantage of the larger container and let the film display all that it has to offer.

My approach is to let the film land where it was originally shot but tone-mapped for PQ display. This will give you a master that had the original intent of the print but in HDR. I often use an LMT that limits the gamut to that of the emulsion used for original photography. This also ensures that I’m staying true to the film's original pallet. Typically there is some highlight balancing to do since what was white and “clipped” is now visible. Next is to identify and correct any areas where the contrast ratios have been disrupted by the increased dynamic range. For example, if there was a strongly silhouetted shot, the value of the HDR highlight can cause your eye to iris down changing the perception of the deep shadows. In this case, I would roll off the highlights or lift the shadows so the ratio stays consistent with the original. The extra contrast HDR affords is often welcomed but it can cause some unwanted issues too. Grain appearance is another one of those examples.


Grain Management

Film grain is one of those magic ingredients. Just like salt, you miss it when it is not there and too much ruins the dish. Grain needs to be felt but never noticed. It is common for the noise floor to increase once you have stretched the film scan to HDR ranges. Also, the grain in the highlights not previously visible starts to be seen. To mitigate this, a grain management pass needs to be implemented. This can come before the grade, but I like to do this after since any contrast I add will have an effect on the perceived amount of noise. Grain can impart a color cast to your image, especially if there is a very noisy blue channel. Once removed this needs to be compensated for and is a downside of working post grade. It is during this pass that I will also take care of flicker and breathing which the grade also affects. My go-to tool for this is Neat Video. You would think that after a decade of dominance some software company would have knocked Neat off their throne as king of the denoise, but it hasn’t happened yet. I prebake the scans with a Neat pass (since Baselight X doesn’t play nicely with Neat yet.) Next, I stack the Neat’ed scan and the original as layers. This allows me to blend in the amount of grain to taste. The goal of this pass is to keep the grain consistent from shot to shot, regardless of the grade. The other, and most important goal is to make the grain look as it did on the print.

Dolby Trim

After the HDR10 grade is complete, it’s time for the Dolby trim. I use the original 14 FL print match version as a reference for where I want the Dolby trim to clip and crush. Once all the trims have been set, I export out a Dolby XML expecting rec2020 primaries as input. Yes, we graded in P3, but that gamut will be placed into a 2020 container once we export.

Mastering

Once all the work has been completed it’s time to master. Remasters receive the same treatment as new theatrical tiles when it comes to deliverables. The common ones are as follows:

  • Graded PQ P3D65 1000nit 16bit Tiff Files or ACES AP0 EXRs

  • Un-Graded PQ P3D65 16bit Tiff files or ACES AP0 EXRs

  • Graded 2.6 XYZ DCDM 14fl

  • Graded PQ XYZ 108nit 16bit Tiff Files or ACES AP0 EXRs for Dolby Vision Theatrical

  • Bt1886 QT or DPX files created from a Dolby XMLIMF PQ rec2020 limited to P3D65 1000nit

Case Studies

Perfect worlds do exist but we don’t live in one. Every job is a snowflake with its own unique hurdles. Remastering tests a colorists abilities across many disciplines of the job. Stong skills in composting, paint, film manipulation, and general grading is what is required to achieve and maintain the original artistic intent. Here are two films completed recently and a bit on the challenges faced in each.

Teenage Mutant Ninja Turtles

For those of you that don’t know the Ninja Turtles are near and dear to me. Not only was I a child of the 80s, but my Father was in charge of the postproduction on the original cartoons. He also wrote and directed many of them. When this came up for a remaster, I jumped at the chance to get back to my roots.

This film only required an SDR remaster. The output delivery was to be P3 D65 2.6 gamma. I set up the job using Baselight’s color management and worked in T-Log E_Gamut. The DRS was performed by Prasad with additional work by yours truly BECAUSE IT HAD TO BE PERFECT!

dark_1.13.1.jpg

There were two main color hurdles to jump through. First, some scenes were very dark. I used Baseligt’s boost shadow tool to “dig” out detail from the toe of the curve. This was very successful in many of the night scenes that the film takes place in.

Another trick I used was on the Turtle’s skin. You may or may not know, but all the turtles have different skin colors. Also, most folks think they are green, when in fact there is very little green in their skin. They are more of an olive. To make sure the ratio of green to yellow was correct I converted to LAB and graded their skin in that color space. Once happy, I converted it back to T-Log E-Gamut. LAB is a very useful space for affecting yellow tones. In this space, I was able to tweak their skin and nothing else. Sort of like a key and a hue shift all in one.

tmnt_lab.gif

The SDR ended up looking so good that the HDR was finished too. The HDR was quick and painless because of Baselight’s built-in color management. Most of the heavy lifting was already done and only a few tweaks needed.


Space Jam

Space Jam was a formative film from my youth. Not only did I have Jordan’s at the time, but I was also becoming a fledgling animation nerd (thanks Dad) when this film was released.

I set up the project for ACES color management with a Kodak LMT that I had used for other films previously. This reigned in the extreme edge of gamut colors utilized in the animation.

The biggest challenge on this project was cleaning up some of the inherent artifacts from 1990’s film recording technology. Cinesite performed all of the original composites, but at the time they were limited to 1k film recording. To mitigate that in a 4k world, I used Baselight’s texture equalizer and convolutional sharpen to give a bit of snap back to the filmed out sections.

Vishal Chathle supervised the restoration for the studio. Vishal and I boosted the looney tunes to have more color and take advantage of the wider gamut. The standard film shots, of which there were few, were pretty straightforward. Corrected mostly with Baselight’s Basegrade. Basegrade is a fantastic tool where the corrections are performed in linear gamma. This yields a consistent result no matter what your working space is.

Joe Pytka came in to approve the grade. This was very cool for me since not only did I grow up watching this film of his, but also all those iconic Superbowl commercials from the 90’s that he did. A true master of camera. He approved the grade but wished there was something more we could do with the main title. The main title sequence was built using many video effects. To recreate it would have cost a fortune. We had the original film out of it, but it looked pretty low res. What I did to remedy this was to run it through an AI up-rezer that I coded a while ago for large format shows.

The results were astounding. The titles regained some of their crisp edges that I can only presume were lost from the multiple generations of opticals that the sequence went through. The AI was also able to fix the aliasing inherent in the low res original. In the end, I was very proud of the result.

The last step was grain management. This show needed special attention because the grain from the Jordan plate was often different from the grain embedded in the animation plate that he was comped into. In order to make it consistent. I ran two de-grain passes on the scan. The first took care of the general grain from the original neg. The second pass was tuned to clean up Jordan’s grain that had the extra layer of optical grain over the top. It was a complicated noise pattern to take care of. Next, I took the two de-grained plates, roto’ed out Jordan, and re-comp-ed him over the cleaned-up plate. This gave consistency to the comps that were not there in the original.

Another area where we helped the comps were in animation error fixing. Some shots had layers that would disappear for a couple of frames, or because it was hand-drawn, a highlight that would disappear and then reappear. I used Baselight’s built-in paint tool to repair the original animation. One great feature of the paint tool is its ability to paint on two’s. An old animation trick is to only animate at 12fps if there isn’t a lot of motion. Then you shoot each frame twice. This halves the number of frames that need to be drawn. When I was fixing animation issues I would make a paint stroke on the frame and Baselight would automatically hold it for the next one. This cut down my work by half just like the original animators!

I was honored to help restore this piece of animation history. A big thanks to Michael Borquez and Chris Gillaspie for the flawless scanning and deep investigation of the best elements to use. Also a tip of the cap to Vishal Chathle for all the hard work and lending me his eagle eye!

Final Thoughts

Restoration Colorist should be a credit on its own. It’s unfortunate that this work rarely gets recognized and even less frequently gets credit. It is hard enough to deliver a director’s artistic vision from scratch. It’s arguably even harder to stay true to it 30 years later. Thanks for reading and check out these projects on HBO Max soon!

Baselight Tips and Tricks

Hey everybody! Here is a video that Filmlight just released on their website. It’s a great series and I’m happy to have contributed my little bit. Let me know what you think.


VHS Shader

A show that I’m currently working on was asking about a VHS look. It made me think of a sequence I did a while ago for Keanu shot by Jas Shelton. In This sequence, we needed to add Keegan-Michael Key to the Faith music video by George Michael.


Often, as colorists, we are looking to make the image look the best it can. This was a fun sequence because stepping on an image to fit a creative mood or period is sometimes harder then making it shinny and beautiful. When done correctly (I’m looking at you Tim and Eric Awesome Show Great Job) it can be a very effective tool for storytelling.

We uprezed the Digibeta of the music video. I then used a custom shader to add the VHS distress to the Arri Alexa footage of Key. I mixed the shader in using opacity until it felt like it was a good match. Jas and I wanted to go farther, but we got some push back from the suits. I think in the end the sequence came out great and is one of my favorite parts of the film… and the gangster kitty of course! Please find the shader used below if you would like to play.

alllll awwwww Keanu!

alllll awwwww Keanu!


JD_logo_VECTOR.jpg